You need to know how to create slick iOS widget in JavaScript
It’s not a long time ago when creating an iOS app or widget was solely available only for Objective-C or Swift developers with a solid Apple dev background (and of course, macOS device for development). These days, with a Scriptable app, it's possible to create a native iOS widget even with basic JavaScript knowledge.


In this short tutorial, we'll create an iOS home screen widget that will display scraped content directly on our iOS device home screen. For example purpose, we'll scrape yahoo.finance losers page, we'll get ticker symbol, name, and daily percentage change. Our script will also serialize these pieces of data into a JSON data source. This JSON file will be updated and published every hour by GitHub Actions. In the end, we use the Scriptable app for getting this JSON data and transform them into an iOS widget.
Of course, we could scrape URL directly using just JavaScript in our Scriptable script, however, we don't need this data in real-time and I believe python and its packages are more suitable for this kind of task.
Scriptable what?
Scriptable is an app for iOS devices. In a nutshell, it allows you to write JavaScript code that will be under the hood translated into native iOS code. It provides you with a variety of nice APIs for creating an iOS widget user interface, networking, notifications, and many more. For skilled iOS developers, this might sound like magic (or it might remind you React Native, Cordova, or even PhoneGap). If you are wondering how it works under the hood I'd recommend this great podcast with the creator of Scriptable, Simon B. Støvring.
Battleplan
- Scrape the URL and create JSON with the scraped content
- Persist and serve data source JSON via GitHub pages
- Update JSON content every hour with GitHub action
- Get JSON content in Scriptable's JavaScript
- Setup and present iOS widget
You'll also need an iOS device with an installed Scriptable app, a GitHub account, and $0 for infrastructure.
1. Scrape the URL and create JSON with the scraped content
Create new GitHub repo and add a new python script (in my case main.py).
import requests
from bs4 import BeautifulSoup
import os
import json
import datetime

loosers_url = 'https://finance.yahoo.com/losers/'
loosers_response = requests.get(loosers_url)
loosers_page = BeautifulSoup(loosers_response.text, 'html.parser')
loosers_table = loosers_page.find('tbody')
looser_rows = loosers_table.find_all('tr')

result_json_content = {}
result_json_content['timestamp'] = datetime.datetime.now().strftime('%c')
result_json_content['loosers'] = []

for looser_row in looser_rows:
  cells = looser_row.find_all('td')
  ticker = cells[0].find('a').string
  name = cells[1].text
  change = cells[4].find('span').string
  result_json_content['loosers'].append({
    'ticker': ticker,
    'name': name,
    'change': change
  })

loosers_json_filename = 'docs/result.json'
if os.path.exists(loosers_json_filename):
  os.remove(loosers_json_filename)

with open(loosers_json_filename, 'a') as loosers_json_file:
  json.dump(result_json_content, loosers_json_file)
This python script gets the content of the URL using the requests package. With BeautifulSoup we'll find data we are interested in (ticker symbol, name, and percentage). At the end of the script, we are using JSON and os packages for serializing and storing JSON on the docs/result.json path. We'll later publish this docs directory to GitHub pages so our data source is available for our iOS widget.
Do not forget to add requirements.txt.
beautifulsoup4
requests==2.23.0
This file is used by GitHub actions for installing dependencies.
2.Persist and serve data source JSON via GitHub pages
Our JSON data source will be served by GitHub pages - go to Settings of your repository and enable GitHub Pages for your docs folder in your main branch. At his time, the content of the docs directory does not exist yet. JSON content will be re-created periodically by the GitHub Action.
3. Update JSON content every hour with GitHub action
In the root of your .github/workflows/ create new pythonapp.yml.
# This workflow will install Python dependencies, run tests and lint with a single version of Python
# For more information see: https://help.github.com/actions/language-and-framework-guides/using-python-with-github-actions

name: Python application

on:
  push:
    branches: [ main ]
  pull_request:
    branches: [ main ]
  schedule:
    - cron:  '0 13-23 * * 1-5'

jobs:
  build:

    runs-on: ubuntu-latest

    steps:
    - uses: actions/checkout@v2
    - name: Set up Python 3.8
      uses: actions/setup-python@v1
      with:
        python-version: 3.8
    - name: Install dependencies
      run: |
        python -m pip install --upgrade pip
        pip install -r requirements.txt
    - name: Run script
      run: |
        python main.py
    - name: Deploy page
      run: |
        git config --local user.email "[email protected]"
        git config --local user.name "GitHub Action"
        git add docs/result.json -f
        git commit -m "Update docs/result.json" -a
        git push "https://makma:${{ secrets.GITHUB_PERSONAL_TOKEN }}@github.com/makma/scriptable-stocks.git" HEAD:main --follow-tags
Edit the last line of the script according to your repository name and GitHub handle.
This action will run at minute 0 past every hour from 13 through 23 on every day-of-week from Monday through Friday. If you want to change this behavior, just edit the cron expression. In addition, it also pushes serialized JSON into the docs folder - this behavior is defined in the Deploy page step.
4. Get JSON content in Scriptable's JavaScript
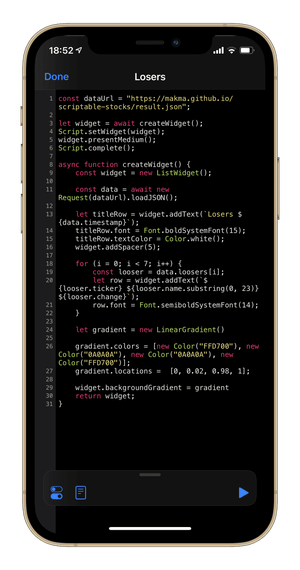
In the Scriptable app create a new script with the following code. This is basically the code of the widget on your iOS device. It renders a medium widget with the first seven losers.
// Variables used by Scriptable.
// These must be at the very top of the file. Do not edit.
// icon-color: red; icon-glyph: magic;
const dataUrl = "https://makma.github.io/scriptable-stocks/result.json";

let widget = await createWidget();
Script.setWidget(widget);
widget.presentMedium();
Script.complete();

async function createWidget() {
    const widget = new ListWidget();

    const data = await new Request(dataUrl).loadJSON();

    let titleRow = widget.addText(`Losers ${data.timestamp}`);
    titleRow.font = Font.boldSystemFont(15);
    titleRow.textColor = Color.white();
    widget.addSpacer(5);

    for (i = 0; i < 7; i++) {
        const looser = data.loosers[i];
        let row = leftColumn.addText(`
            ${looser.ticker}
            ${looser.change}
        `);
        row.font = Font.semiboldSystemFont(14);
    }

    let gradient = new LinearGradient()

    gradient.colors = [new Color("3a8cc1"), new Color("00A9D6")];
    gradient.locations =  [0, 1];

    widget.backgroundGradient = gradient
    return widget;
}
Change data URL to your JSON data source published on GitHub pages.
Protip: Use the Scriptable app directory in your iCloud drive. You can see all your scripts here. Moreover, you can write code directly in your favorite IDE on your PC or Mac.
5. Setup and present iOS widget
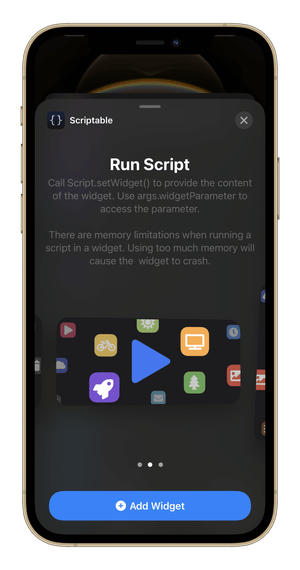
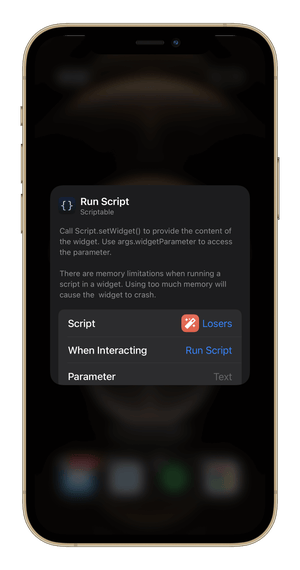
The last step is adding the widget to your screen. Add a new script to the Scriptable app and add a new Scriptable widget. Select Medium size and set your Script.

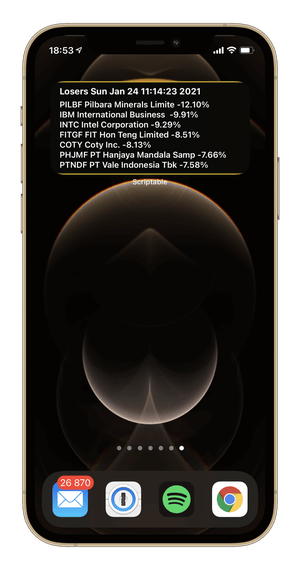
Your new widget should be displayed now.
You can find all the files and source code on GitHub.
Disclaimer: I'm not connected with the Scriptable app or Yahoo.
Originally published at hackernoon.